


Android
- Home
- ●
- Support
- ●
- Email / Customer Support
- ●
- Android
Visionfriendly Support
New Android Email Settings:
1) Open Your Phone’s Settings Screen and Navigate to Accounts

2) Select Add Account

3) Select Email

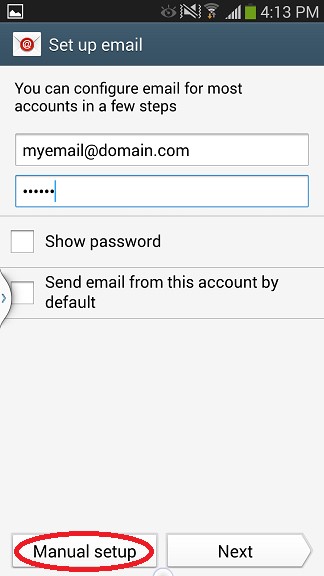
4) Enter your Email address and password and select MANUAL SETUP
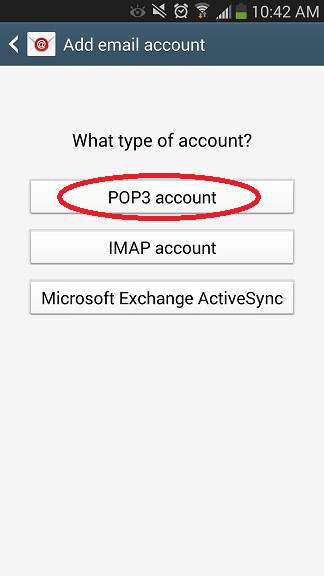
5) Select POP3 account
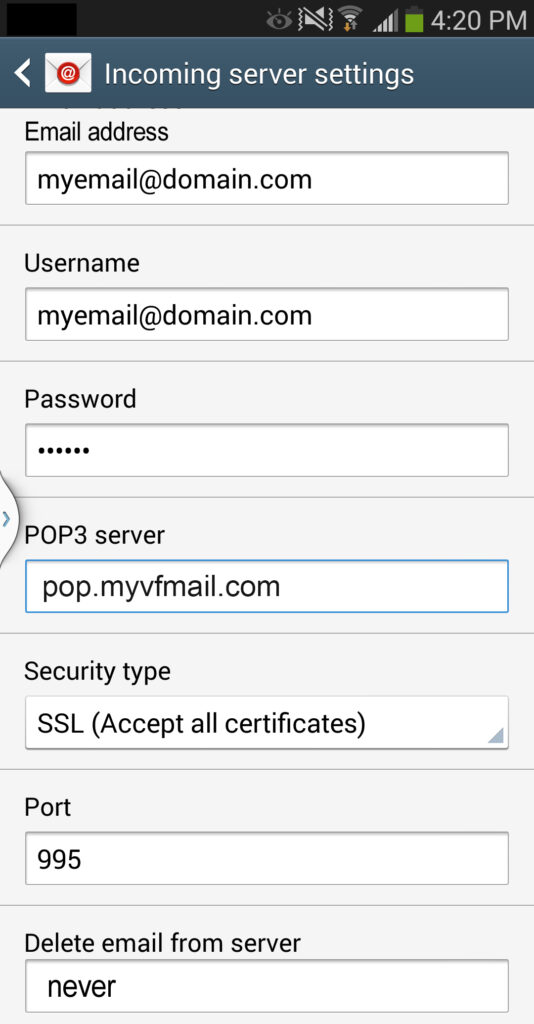
6) Under Incoming server settings:
- Enter your full email address as both your email address and your Username.
- Enter your email password in the password field.
- Your incoming servername will be either:
pop.myvfmail.com or imap.myvfmail.com depending on your account type (POP3 or IMAP) - The security type should be set to SSL (Accept all certificates)
- The Port number should be 995.
- Make sure the Delete email from server field is set to NEVER.
- Once these are set, select Next.
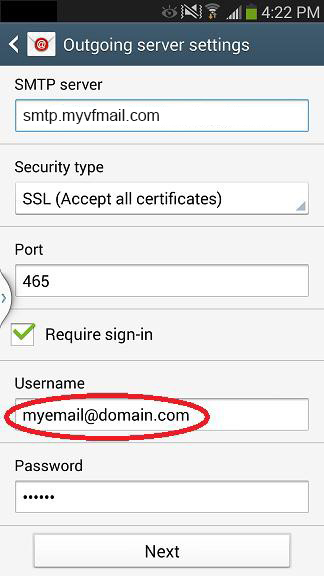
7) In the SMTP server field enter field enter smtp.myvfmail.com. The security type should be set to SSL (Accept all certificates) and the Port number should be 465.
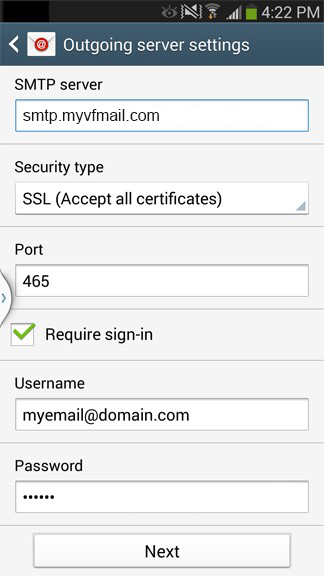
8) Require sign-in should be checked. The Username field should be your full email address. The password should be your email password. Once these are filled out correctly you may select Next.
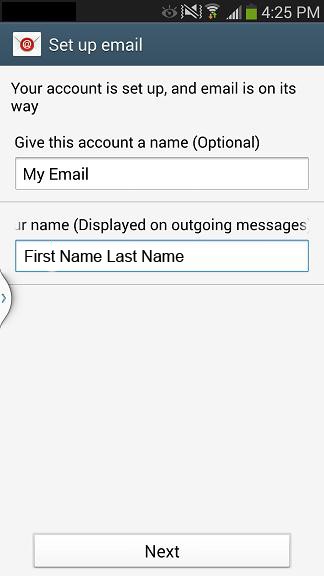
9) On the next screen the defaults should be acceptable. Please press next.

10) You may give the account any name; this is what your email will be named under your phone’s email accounts. The second box is your name which is displayed on outgoing messages. Select Next when you have finished.
11) The set up portion should now be done. Go to your inbox and try sending and receiving a test e-mail.